ISXVG Setup: Step 3
ISXVG Setup: Step 3
Starting up Vanguard with ISXVG
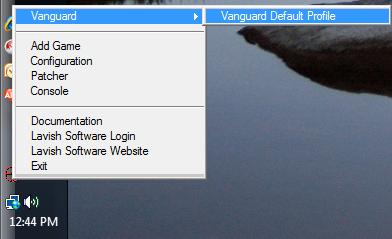
Step 1: Launch Vanguard with ISXVG
To start Vanguard with InnerSpace and ISXVG attached, move your mouse to the windows task bar tray, right click on the InnerSpace icon, and choose the "Vanguard Default Profile":
Step 2: Authentication
Once the game has finished the initial loading procedure, the isxGames Authentication Utility window will appear, which looks like this:
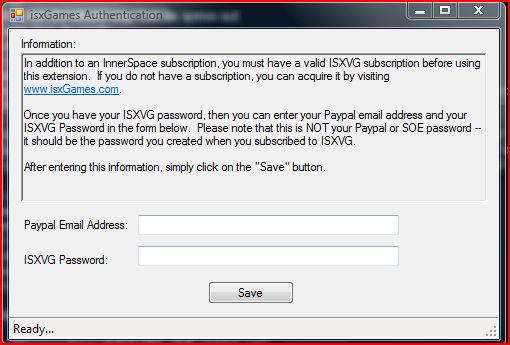
Within that window, you will want to enter your PayPal Email Address, and your ISXVG Password. After doing so, click on "Save". The Authenticator will then verify your subscription and will tell you so. If everything is good to go, you can "Close" the window.
Step 3: Load Extension
Since this is your first time using ISXVG, and since you had to go through the isxGames authentication procedure, ISXVG will unload itself. So, now, in game, hit your tilde (~) key and type "ext isxvg" in the InnerSpace console. ISXVG should then patch itself and load normally.